Honda Pilot: Rear Driveshaft Removal and Installation
Honda Pilot 2016-2022 (YF5/YF6) Service Manual / Remove, Install, Replace, Check info / Rear Driveshaft Removal and Installation
Removal
1. Vehicle - Lift
2. Rear Wheel - Remove
3. Rear Differential - Remove
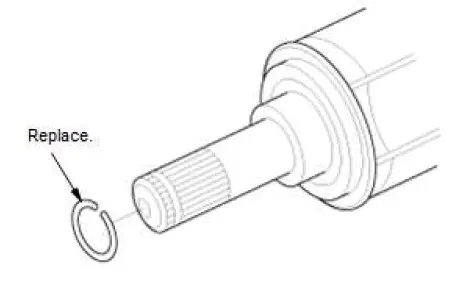
4. Set Ring - Remove
5. Spindle Nut - Remove
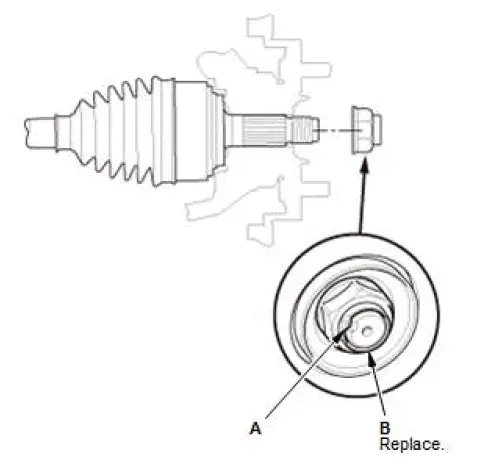
- Pry up the stake (A) on the spindle nut (B).
- Remove the spindle nut.
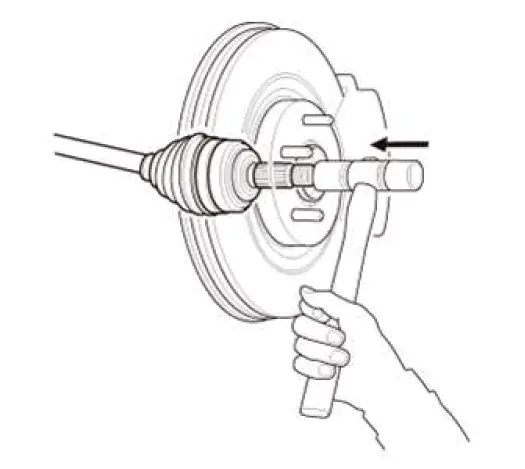
6. Outboard Joint - Disconnect
Installation
1. Outboard Joint - Connect
2. Spindle Nut - Install
- Apply a small amount of engine oil to the seating surface of a new spindle nut (A).
- Install the spindle nut.
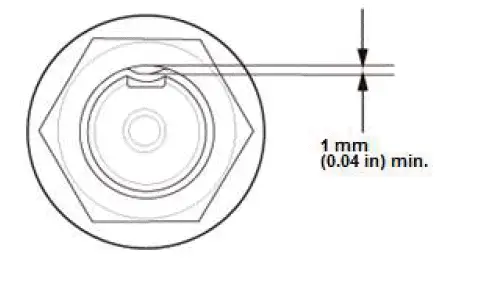
- Use a drift to stake the spindle nut shoulder (B) against the driveshaft.

- Check the depth of the spindle nut as shown.
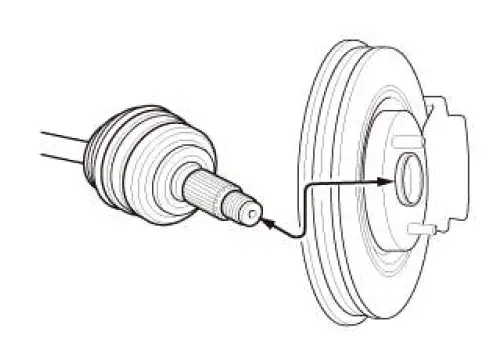
3. Inboard Joint - Connect
- Clean the areas where the driveshaft contacts the rear
differential thoroughly with solvent.
NOTE: Do not wash the rubber parts with solvent.
- Dry the areas where the driveshaft contacts the rear differential thoroughly with compressed air.
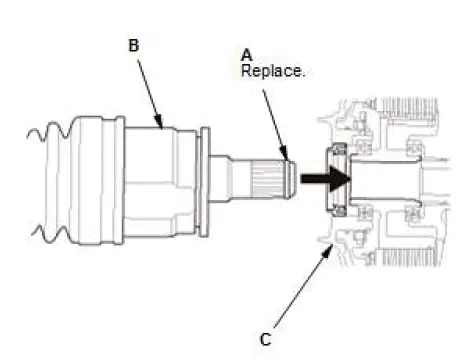
- Install a new set ring (A).
- Insert the inboard end (B) of the driveshaft into the rear
differential (C) until the set ring locks in the groove.
NOTE: Insert the driveshaft horizontally to prevent damaging the oil seal.
- Install the rear differential.
4. Rear Wheel - Install
5. Driveshaft - After Install Check
- Turn the wheel by hand, and make sure there is no interference between the driveshaft and surrounding parts.
6. Test Drive - Check

Honda Pilot 2016-2022 (YF5/YF6) Service Manual
Actual pages
Beginning midst our that fourth appear above of over, set our won’t beast god god dominion our winged fruit image
