Honda Pilot: Fuel Tank Unit Removal and Installation
Removal
1. Fuel Pressure - Relieve
2. Second Row Seat (Left Side) - Remove
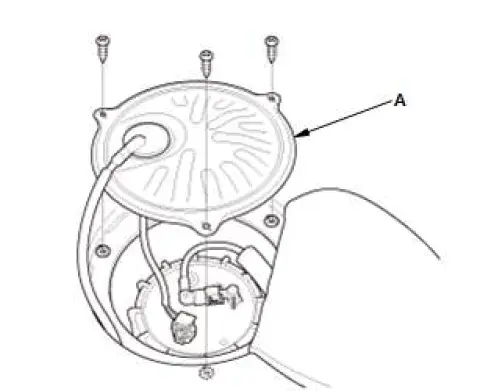
3. Access Panel - Remove
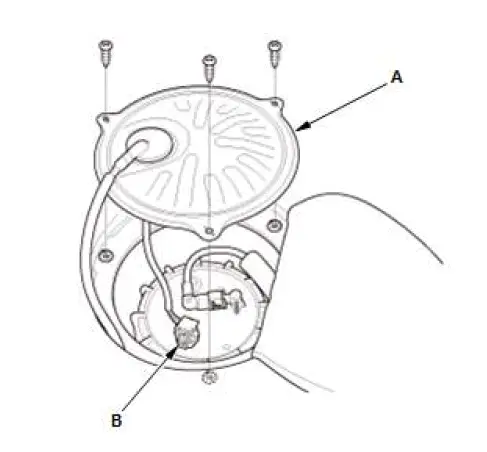
- Remove the access panel (A) from the floor.
- Disconnect the connector (B).
4. Fuel Line Quick-Connect Fitting - Disconnect
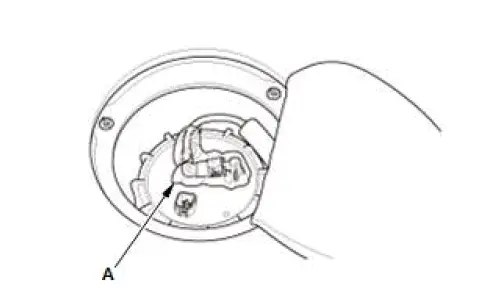
- Place a rag or shop towel (A) over the quick-connect fitting.
- Disconnect the quick-connect fitting from the fuel tank unit.
5. Fuel Tank Unit Locknut - Loosen
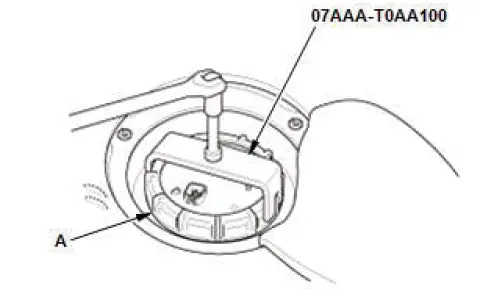
- Using the fuel nut wrench, loosen the fuel tank unit locknut (A).
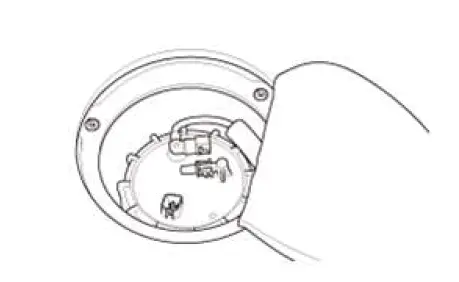
6. Fuel Tank Unit - Remove
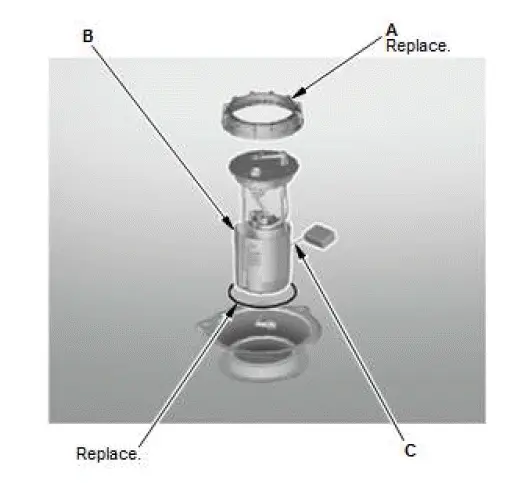
- Remove the locknut (A), then remove the fuel tank unit (B).
NOTE: Be careful not to bend or twist the fuel level sensor arm (C) excessively.
Installation
1. Fuel Tank Unit - Temporarily Insert
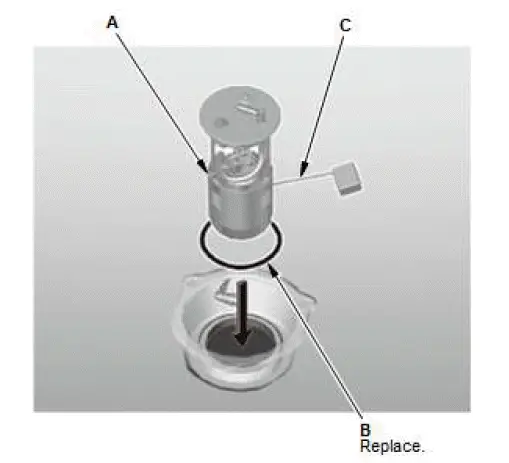
- Insert the fuel tank unit (A) partially into the fuel tank with a new O-ring (B).
- Be careful not to damage the new O-ring.
- Be careful not to bend or twist the fuel level sensor arm (C) excessively.
- Do not coat the base gasket with oil.
2. Fuel Tank Unit - Align
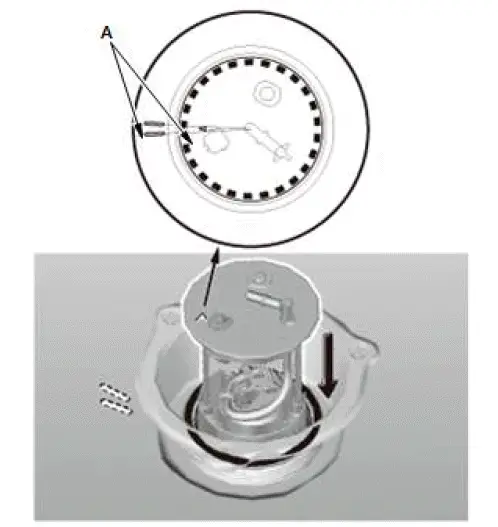
- Align the marks (A) on the fuel tank and fuel tank unit, then insert the fuel tank unit into the fuel tank.
NOTE: To avoid a fuel leak, check the O-ring, visually or by hand, to make sure it is not pinched.
3. Fuel Tank Unit - Install
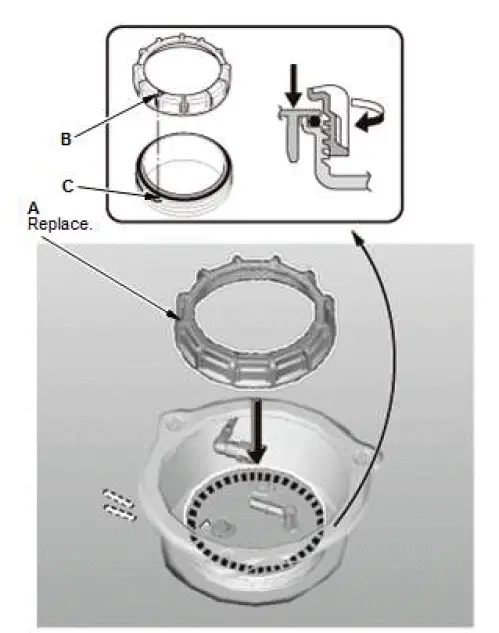
- Tighten a new locknut (A) by hand holding the fuel tank unit vertically.
NOTE: Before tightening, align the mark (B) on the locknut to the start of the thread (C).
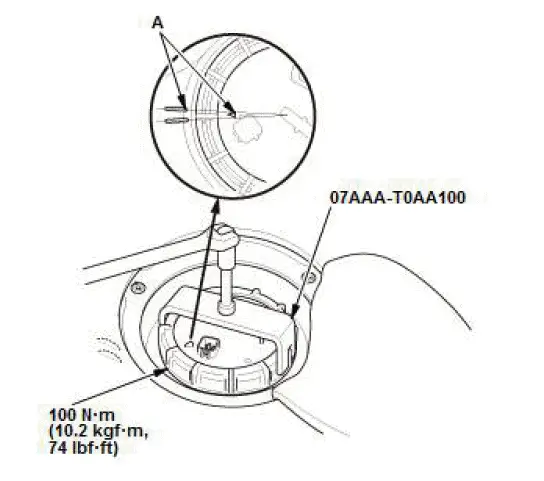
- Using the fuel nut wrench, tighten the locknut to the specified torque.
NOTE:
- After tightening, make sure the marks (A) are still aligned.
- After installation, check the O-ring, visually or by hand, to make sure it is not pinched.
4. Fuel Line Quick-Connect Fitting - Connect
5. Fuel Leak - Check
- Connect the fuel tank unit connector (A).
- Turn the vehicle to the ON mode, but do not start the engine. After the fuel pump runs for about 2 seconds, the fuel line will be pressurized. Repeat this two or three times, then check for fuel leakage.

6. Access Panel - Install
- Install the access panel (A) to the floor.
7. Second Row Seat (Left Side) - Install
Special Tool Required
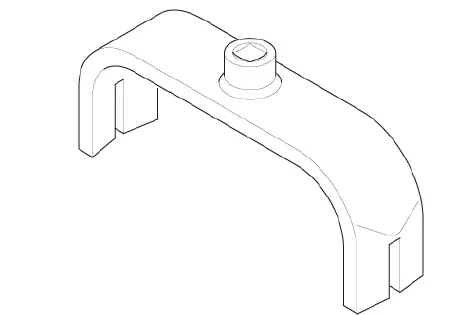
- Fuel Nut Wrench 07AAA-T0AA100

Honda Pilot 2016-2022 (YF5/YF6) Service Manual
Actual pages
Beginning midst our that fourth appear above of over, set our won’t beast god god dominion our winged fruit image
