Honda Pilot: Ball Joint Boot Replacement and Inspection
Honda Pilot 2016-2022 (YF5/YF6) Service Manual / Remove, Install, Replace, Check info / Ball Joint Boot Replacement and Inspection
Inspection
1. Ball Joint Boot - Inspect
Front Lower Arm Ball Joint/Rear Upper Arm
- Check the ball joint boot for weakness, damage, cracks, and inner boot grease leaks.
NOTE:
- If the ball joint boot is damaged with grease leaks, replace the appropriate part as an assembly.
- If the ball joint boot is weak and cracked, but does not leak grease, replace the appropriate ball joint boot.
Replacement
Front Lower Arm Ball Joint
1. Vehicle - Lift
2. Front Wheel - Remove
3. Lower Arm Ball Joint - Remove
4. Ball Joint Boot - Remove
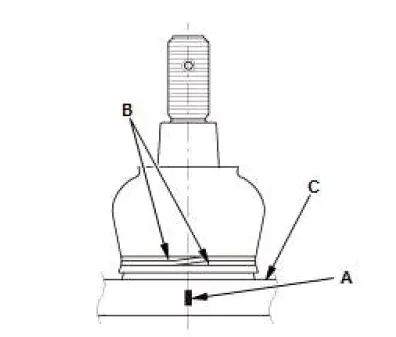
- Paint a alignment mark (A) in the center between the both boot clip end faces (B) on the lower arm (C).
- Remove the boot clip and the boot.
5. Ball Joint Boot - Install
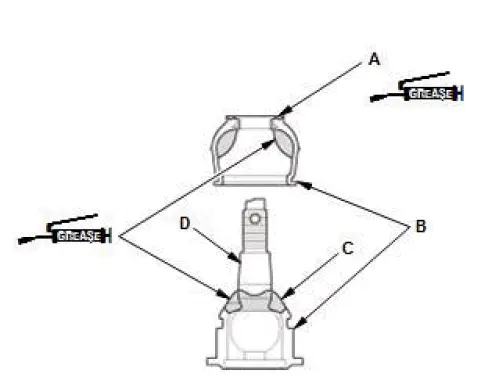
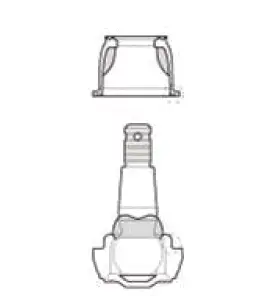
- Pack the interior and lip (A) of a new boot with grease.
NOTE:
- Keep the grease off of the boot-to-lower ball joint housing mating surfaces (B).
- Use the grease that comes with the ball joint kit, or multi-purpose grease.
- Do not let dirt or other foreign materials get into the boot.
- Pack fresh grease into the base (C).
- Install the ball joint boot.
- Squeeze it gently to force out any air.
- Wipe the grease off the tapered portion of the ball joint pin (D).
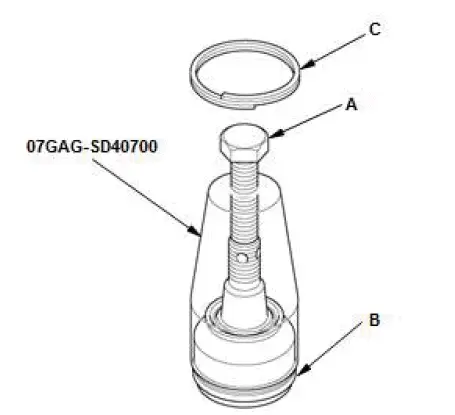
- Adjust the clip guide with the adjusting bolt (A) until its base is just above the groove around (B) the bottom of the boot.
- Slide the clip (C) over the clip guide and into position on the boot.
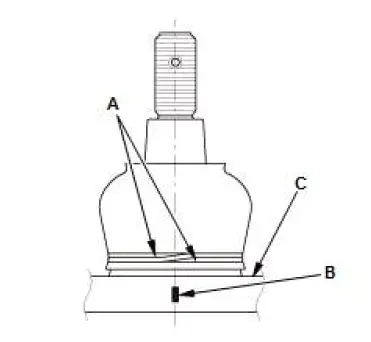
- Align the center between the both end faces (A) of the boot clip to alignment mark (B) of the lower arm (C).
- Wipe any grease off the exposed portion of the ball joint pin.
6. Lower Arm Ball Joint - Install
7. Front Wheel - Install
Rear Upper Arm
1. Vehicle - Lift
2. Rear Wheel - Remove
3. Rear Upper Arm - Remove
4. Ball Joint Boot - Remove
5. Ball Joint Boot - Install

- Pack the interior and lip (A) of a new boot with grease.
NOTE:
- Keep the grease off of the boot-to-lower ball joint housing mating surfaces (B).
- Use the grease that comes with the ball joint kit, or multi-purpose grease.
- Do not let dirt or other foreign materials get into the boot.
- Pack fresh grease into the base (C).
- Install the ball joint boot.
- Squeeze it gently to force out any air.
- Wipe the grease off the tapered portion of the ball joint pin (D).
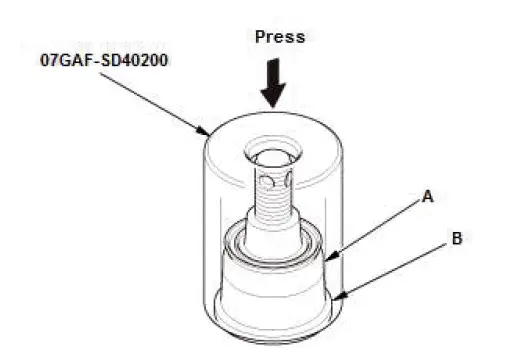
- Press the boot (A) with the bearing driver attachment until the bottom seats (B) on the lower ball joint housing all the way around.
- Wipe any grease off the exposed portion of the ball joint pin.
6. Rear Upper Arm - Install
7. Rear Wheel - Install
Special Tool Required
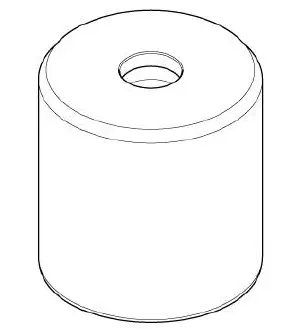
- Hub Dis/Assembly Tool, 42 mm 07GAF-SD40200

- Clip Guide, 44 mm 07GAG-SD40700

Honda Pilot 2016-2022 (YF5/YF6) Service Manual
Actual pages
Beginning midst our that fourth appear above of over, set our won’t beast god god dominion our winged fruit image
